


Dr Dimpho Elephant (Senior Soil Scientist), Dr Thandile Mdlambuzi (Soil Scientist), and Keith Collings (Diagnostic & Analytical Resource Manager)
Soil testing is one of the most cost-effective management tools available to a grower. Proper sampling and testing are essential for determining the specific nutrient requirements of a sugarcane field, as they help identify the chemical and nutrient properties of the soil. These practices improve the value of nutrient investments and assist in identifying crop-limiting conditions that may reduce productivity. Approximately 80% of the errors in soil testing occur during the sample collection process in the field. Poor sampling leads to poor recommendations, regardless of how advanced the laboratory analysis may be.
The golden rule: A soil test is only as good as the sample. A few grams of soil analysed in the laboratory must accurately represent roughly 2000 tons of topsoil per hectare.
Why soil testing is important
A holistic soil analysis allows growers to:
- Support plant growth: Determine the soil’s capacity to support healthy crops.
- Identify nutritional status: Pinpoint specific nutrient deficiencies or toxicities.
- Guide remedial action: Inform the requirements for fertilisers, lime, or other amendments based on scientific thresholds.
- Monitor changes: Track how management activities and climate events (like leaching rains) affect soil health over time.
- Enhance efficiency: Use grid sampling to spatially characterise soil variability, allowing for more precise, variable-rate applications of fertiliser and lime.
When and how often to sample
- Timing: Samples can be taken year-round. However, they should be done as soon as possible after harvest for replant and ratoon cycles to allow time for amendments like lime to react in the soil.
- Frequency: Ideally, collect samples after every harvest for the most accurate recommendations.
How to collect a representative sample
- Select the sampling area
- Divide the field: Identify “sampling units” that are relatively homogenous in soil properties. A single sample should not represent more than 5 hectares.
- Avoid riparian zones and do not sample near anthills, old roads, or loading areas.
- Treat problem patches separately: Underperforming areas should be sampled independently to identify specific localised issues.
- Topsoil sampling procedure (routine fertility)
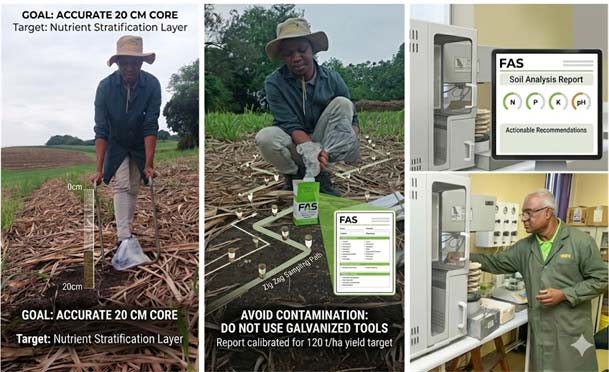
A Beater auger (bicycle handle auger) with a 20 cm coring bit should be used to take soil samples, to ensure consistent depth and volume. Sample exactly to a depth of 20 cm for crops like sugarcane. Incorrect depth leads to biased results (e.g. sampling too shallow overestimates nutrients). Take 20 to 30 cores (subsamples) for a standard field. Thoroughly mix the cores in a clear plastic bag, break up clods, and remove stones or large roots before filling the sample box. Samples must be representative of the area being assessed.
Important cautions
- Avoid contamination: Never use old fertiliser bags or galvanised/plated tools (which can contaminate samples with zinc or copper) for soil sample collection.
- Different places that show different growth must be sampled separately.
- Accurate labelling: Ensure the field number on the box matches the submission form exactly.
- Specify yield targets: Always include a realistic target yield on the submission form to receive appropriate recommendations.
- Where possible, include field co-ordinates.
By investing time in representative sampling today, you ensure that every kilogram of fertiliser applied tomorrow is a calculated investment rather than a guess. Proper soil management turns a “cost” into a “return on investment.”